Label Setups & Integration
In this section, we will show you how to create a BarTender Label in Business Central that will allow you to pass through data to Label Templates within BarTender.
BarTender Labels
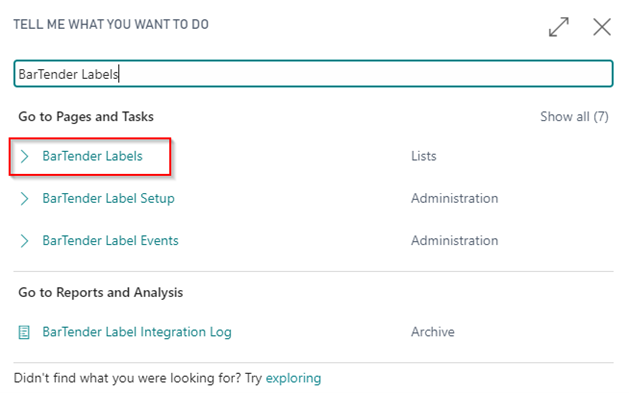
- Click the magnifying glass and type BarTender Labels in the Search box.
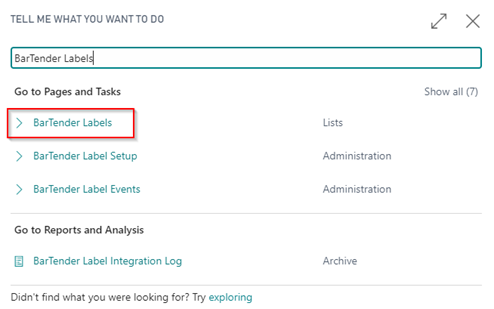
- Click New to create a new BarTender Label or Select a Label Code to open an existing BarTender Label card.

- This will open the BarTender Label card.
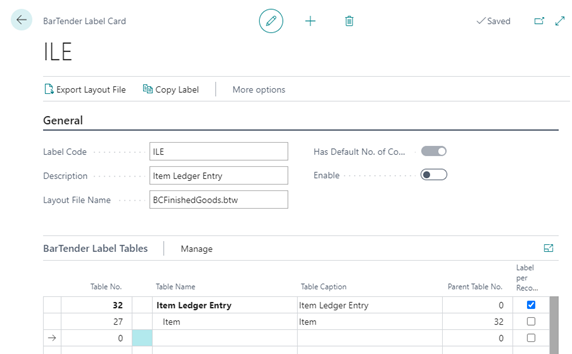
General FastTab
| FIELD NAME | FUNCTION |
|---|---|
| Label Code | Code to describe the label. |
| Description | Description of the label. |
| Layout File Lookup |
|
| Layout File Name | The .btw template file name with which the Business Central fields should be integrated. |
| Has Default No. of Copies | This field will be toggled on or off depending on if you have the “Set Value as Default No. of Copies” option (Described in the following Fields section) enabled for a field selected in the “BarTender Label Tables” section of the BarTender Label Card. |
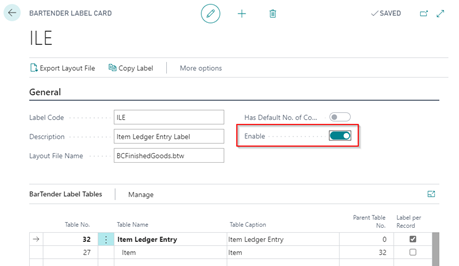
| Enable | Toggle on to enable the Label for use. |
| Is Label Enabled | Shows whether the Label is currently enabled for use. NOTE: To make edits to any Labels, this will need to be disabled. |

BarTender Label Tables FastTab
| FIELD NAME | FUNCTION |
|---|---|
| Table No. | The BC Table object number from which the label information will be generated. |
| Table Name | Auto-populates based on the Table No. selected. |
| Table Caption | Auto-populates based on the Table No. selected. |
| Parent Table No. | This field is used to link related tables to the main table from which the labels will be printed. This creates the hierarchy necessary to link the correct records. |
| Label per Record | DO NOT check this box until you have chosen your Fields as described in the next section. Check this box on the primary table record from which label data is being retrieved. This will typically be at the lowest level in the hierarchy for repeating records. |
Examples:
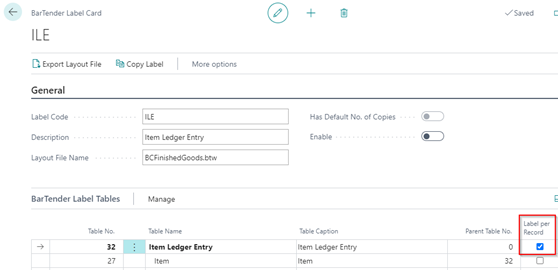
- Printing a Label from the Item Ledger Entries page: In this example, you are intending to print your labels directly from Item Ledger Entry. Therefore, you would mark this table as indicated in the screenshot below.

- Printing a Label for Items on a Posted Purchase Receipt: In this example, you are intending to print your labels from the Posted Purchase Receipt document header. The primary data will be coming from the Purch. Rcpt. Line records associated with the document, therefore that would be the table record on which to check Label per Record.


Formulas Action
In the Ribbon of the Label Card you can click the Formulas button to create calculated values from print data sources.
| Field Name | Function |
|---|---|
| Description | A description used to identify the Formula line. |
| Formula | Enter the formula for the calculation. Formulas can be configured by utilizing Named Data Sources in brackets previously specified as Fields in the Label Tables with the appropriate mathematical operators. For example, if we need to calculate the total cubage of a line and divide that by the pallet's max capacity. Utilizing a Sales Order we are printing pallet tags with the following equation: ([SalesLine_Quantity]*[SalesLine_UnitVolume])/10 |
| Rounding Precision | Set the rounding precision for the formula calculation. A value of 1 is recommended if the value wil be used to determine print copies. |
| Set as default number of copies | Sets the value of the formula as a the default number of copies. |
| Named Data Source | The name of the data source sent to Bartender. |
| Error Action | Determines whether to stop the print job or send a default error value instead. |
| Error Value | The value to send instead when the formula calculation errors. |
Fields: Data to be Sent to BarTender Label Templates
| FIELD NAME | FUNCTION |
|---|---|
| Field No. | The field(s) selected can be utilized on BarTender template labels. |
| Field Name | Auto-populates based on the Field No. selected. |
| Field Caption | Auto-populates based on the Field No. selected. |
| Field Class | Auto-populates based on the Field No. selected. |
| Named Data Source | The source names that will be utilized in BarTender to link the in the label templates to Business Central. This will auto-generate the name based on the Field No. selected. It is not recommended to change this auto-generated value. |
| Set Value as Default No. of Copies | The number of label copies will be based on the decimal or integer value associated with what is being printed (typically a “Quantity” field). |
| Layout File Name Variable | If the Layout File Lookup option is Dynamic for the label - this field is used to designate the value to dynamically pull in for the file name. |
| Use For Formula Only | If this box is checked the field data won't send to BarTender, but still allows it to be used in a formula. |
Example: If an Item Ledger Entry for an Output has a quantity of 10 then the number of labels to be printed will be defaulted to 10 automatically. At the time of printing, the user will still be able to override the No. of Label value.
Note
If there are multiple records in the selection (such as Purchase Lines, Item Ledger Entries, etc.), the default No. of Labels will be the same for each record. So, this option is best used when you will be printing a single label per line or entry (for most scenarios).

Table Relation: Establish Relationships to Parent Table(s)
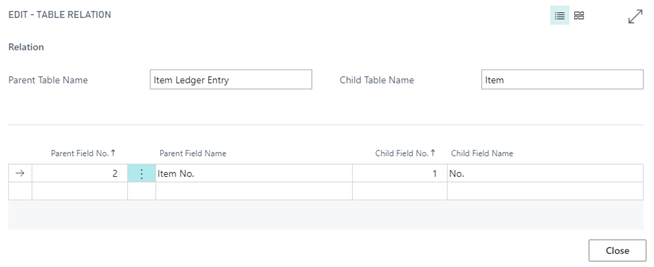
If more than one table is selected, then the table relation must be established to link the data from the tables.

| FIELD NAME | FUNCTION |
|---|---|
| Parent Field No. | Field No. from the Parent Table to be mapped to the Child Field No. |
| Parent Field Name | Auto-populates based on the Parent Field No. selected. |
| Child Field No. | Field No. from the Child Table to be mapped to the Parent Field No.. |
| Child Field Name | Auto-populates based on the Child Field No. selected. |
Label Printing Order
Labels printing order can be set based on table keys. If no key is selected, then the table will print based on the default key. The Key field can be added through page personalization to the BarTender Label Tables subform. A key other than the default can be selected by choosing the Label Sort Key action on the BarTender Label Tables menu.
Note
If how you would like to sort the labels during printing is not an existing key - a developer can add keys to the table and they will become available to select.
Dynamic Layout file Names
If the Layout File Lookup option is set to Dynamic the layout file name will can be determined by defining variables in the Table Fields page.
For example, if labels needed to be different depending on the customer and item type then this could be accomplished by using the dynamic option for the Layout File Lookup.
On the Field selection for the Customer Table - select the field that will hold the value to be used in the file name and give it a Layout File Name Variable:

This can be done for as many fields as needed - the Layout File Name will need to be configured to have the Layout File Name Variables in brackets. So if the Item Table hd a variable for Item Category's Layout File Name Variable as Category then the Layout File Name could be configured as TAG[Customer][Category].btw and the file name would be dynamically determined based on the values in the variable fields.

Note
The variable definition within the fields page should not be in brackets. However, they need to be in brackets when specifying the layout file name on the BarTender Label Card page.
How To: Create a BarTender Label in BC
The following example shows the creation of a Label for a purchased Item by pulling information from the Item Ledger Entry table and its related Item table record.
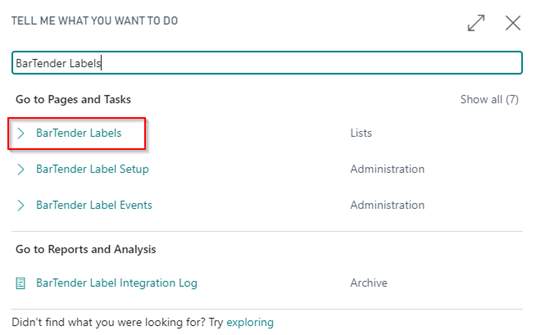
Click the magnifying glass, type BarTender Labels in the Search bar and select the related link.
Click New to create a new Label.

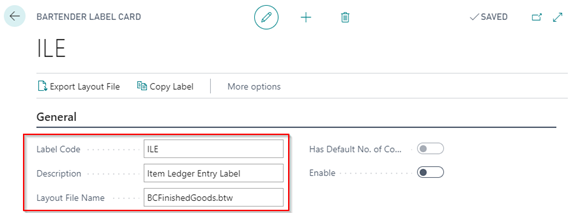
Enter a Code, Description, and Layout File Name that best describes the label’s needs. Do not select Enable yet. For example:
- Code: ILE
- Description: Item Ledger Entry Label
- Layout File Name: BCFinishedGoods.btw
In the BarTender Label Tables FastTab, create a line using Table No. 32 (Item Ledger Entry).

While remaining in the BarTender Label Tables FastTab, go to the next line, and select Table No. 27 (Item).

Click the AssistEdit button within the Parent Table No. field on the Table No. 27 (Item) line record.

Highlight to select Table No. 32 (Item Ledger Entry) and click OK to set the Parent Table No.
Note
Note that in some scenarios outside this example there may be multiple values to choose from.
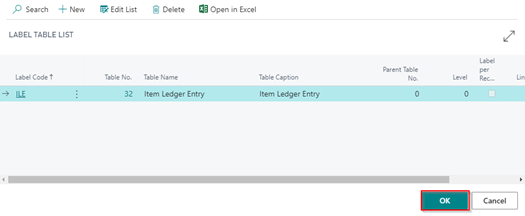
Once the Parent Table No. field has been populated, the Table Name field for the “child” table will indent automatically. Your lines should now look like the screenshot below:

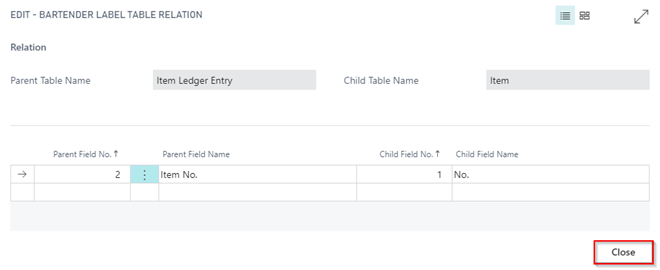
With the Table No. 27 (Item) line record selected, click Manage and then Table Relation.

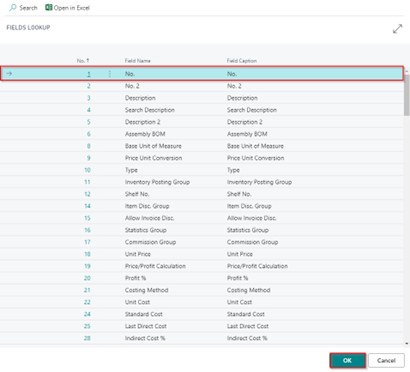
In the resulting window, click the AssistEdit button within the Parent Field No. field and select No. 2 (Item No.) from the list.

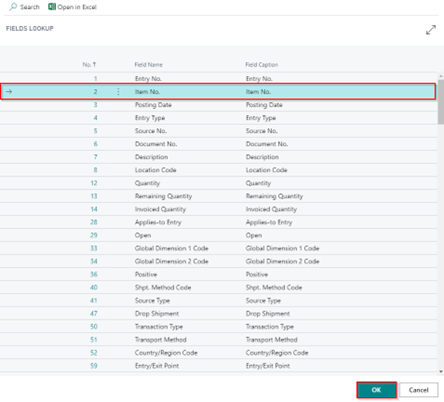
In the Child Field No. select field No. 1 (No.) using the AssistEdit button within the field and click OK. This maps the Item Ledger Entries table and Item table using the Item No.
Click Close when done.
Back in the BarTender Label card, select the first line for the Item Ledger Entry table, click Manage, and then click the Fields button.

In the Field No. column, we will add the fields we want to integrate with BarTender. You can see the list of available table fields by click on the AssistEdit from within the line.

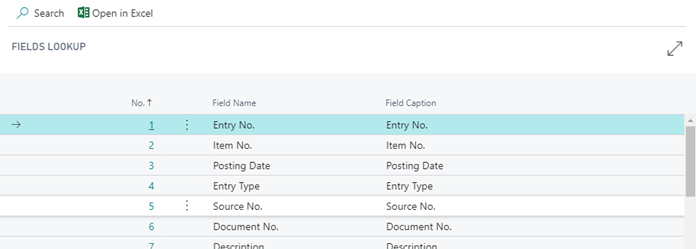
- For this example, we will add the following fields for Item Ledger Entries:
- Item No.
- Quantity
- Lot No.
- For this example, we will add the following fields for Item Ledger Entries:
Click the Back arrow at the top left of the page or Esc on your keyboard when done to close the page.
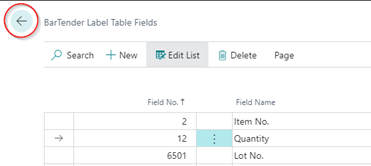
Repeat Steps 12 and 13 to select the fields for each table.
For this example, we will add the following fields for Item: - Description - Base Unit of Measure

Click the Back arrow at the top left of the page or Esc on your keyboard when done to close the page.

Check the Label per Record, on the Item Ledger Entry Table No. 32, which is the primary table from which data is being retrieved.
Finally, click Enable to enable the BarTender Label for use. Close the page.
How To: Export the BarTender Label Fields for Integration
This section will demonstrate how to export the Business Central fields you have selected within the created BarTender Labels in the Create a BarTender Label in BC for Integration section to use as Named Data Sources in the Label Template in BarTender Designer.
In Business Central, in the search, enter BarTender Labels and select the related link.
Open the BarTender Label card that will be linked to Bar Tender by clicking the Label Code.

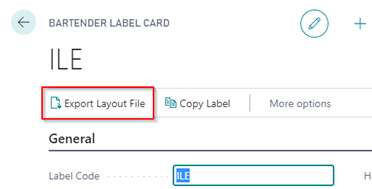
In the Action Pane, click Export Layout File. This file will provide the integration names that we will use to map the fields in BarTender in the next section.
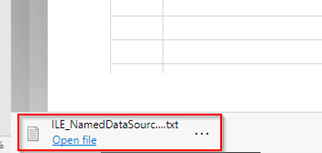
Once the download of the file is complete, click Open File to open the file in Notepad.
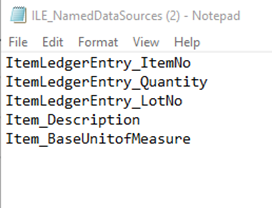
The file contains the fields from the BarTender Label that were exported. Leave this file open as the fields will be utilized in the next step within BarTender Designer.
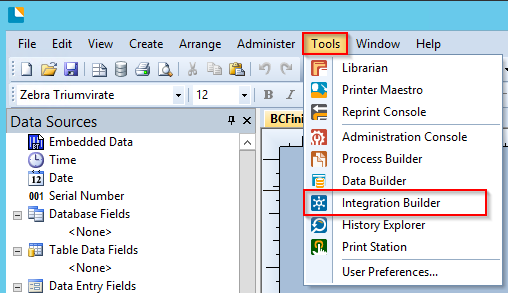
Open BarTender Designer, then open the Integration Builder from the Tools menu dropdown.
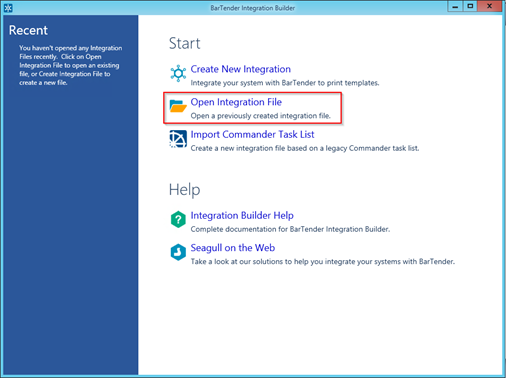
Select Open Integration File and then select the Integration file created via Integration Setup in BarTender Designer.
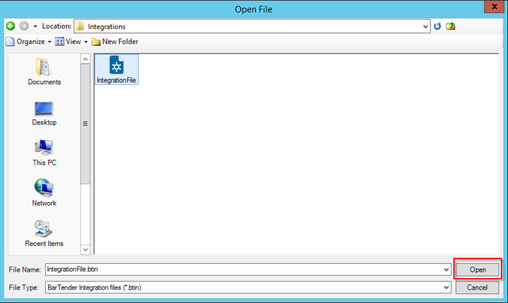
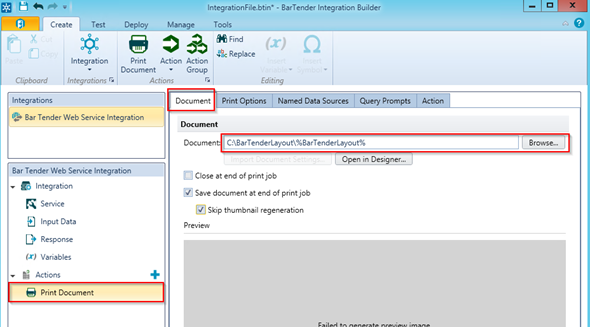
Click Print Document under the Actions tab in the Navigation pane. Click the Document tab then click Browse for the document path and enter it in the Document field. This will be the path where the layout files are stored. At the end of the path add %BarTenderLayout%. It should like the below screenshot.
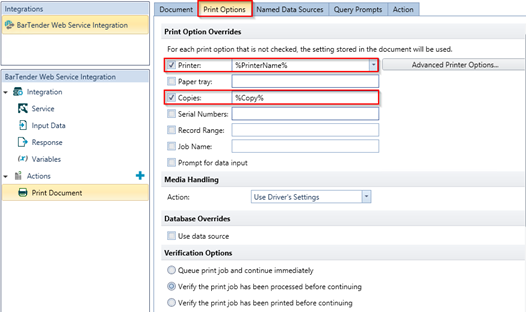
Click the Print Options tab. Place a checkmark in the checkbox for Printer and type %PrinterName% in the field. Then place a checkmark in the checkbox for Copies and type %Copies%.
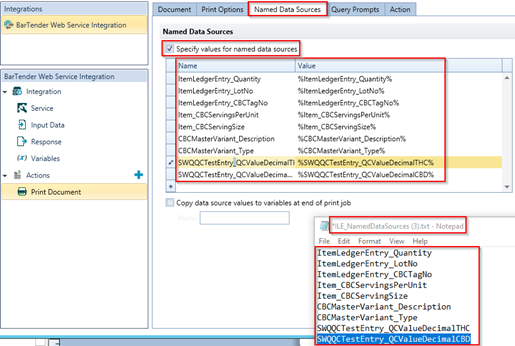
Click the Named Data Sources Tab. Place a checkmark in the checkbox for “Specify values for named data sources”. Now you can enter the fields you exported from Business Central and pasted into Notepad in Steps 3 and 4 above. In the Name column enter the value exactly as it was exported in the file. You can use Copy and Paste. In the Value column enter the same value you put under Name surrounded by “%” as shown below.
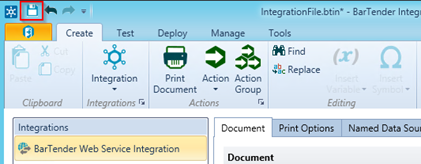
Click Save in BarTender. Give the Integration file a File Name and click Save to close the file window.
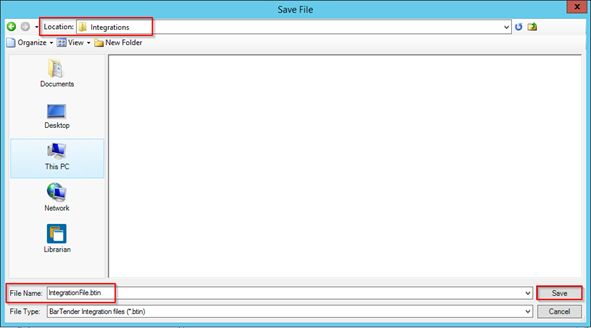
Choose the location to save the Integration file, enter a File Name, then click Save.
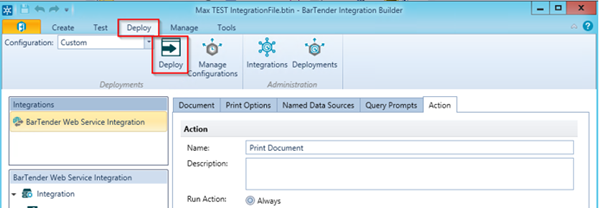
Once the file is saved, click the Deploy Tab then click Deploy in the Action Pane.
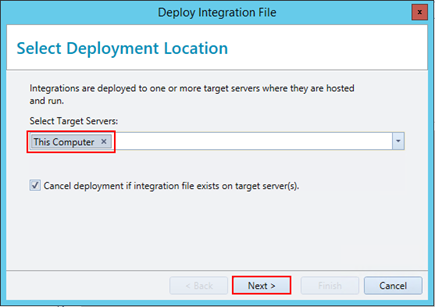
In the Select Deployment Location window, click the drop-down arrow in the Select Target Servers field, and select This Computer under Servers and then Next.
In the next window click Deploy Now and click Finish.
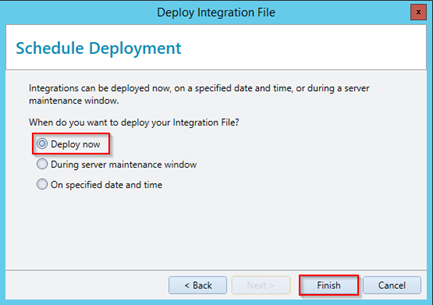
The next window that opens will show the deployed Integrations.

Close the Integration Builder.
How to Export/Import Label Configurations
Label configurations can be exported and imported from the list page or individually from the Bartender Label Card.
Select the completed label(s) you want the export.
In the ribbon click the Import Labels button dropdown and select Export Selected Labels.
This will download a JSON file than can be used to import the label into another company or environment.
To import the JSON file click the Import Labels button in the Ribbon of a Bartender Labels list page or Bartender Label Card.
This will open a window where you can upload and process the file.
Click the Upload File button and select your file.
BC will populate the Label Code and Description fields from the import file and flag whether or not that label code already exists.
Select how the Import Action will behave in the dropdown menu. Options are:
- Replace Existing
- Create New
- Skip
If creating new enter a New Label Code and New Description.
Click the Process button in the Ribbon.
A Status Message will display on screen and the Import Status field for that line will update.
Map BC Fields to Bartender Labels
These instructions assume you know how to design labels in the BarTender Designer software. In these instructions, we are mapping the fields exported from the BarTender Label in Business Central to the BarTender Label Template. There are two methods we can use to add the Named Data Sources to the label template, which will be explained in this section.
Add Named Data Sources to a BarTender Label Template
In a new label or an existing label template, click the Data Sources tab in the Navigation Pane.
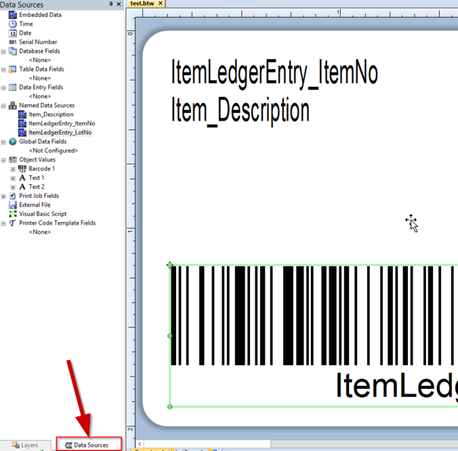
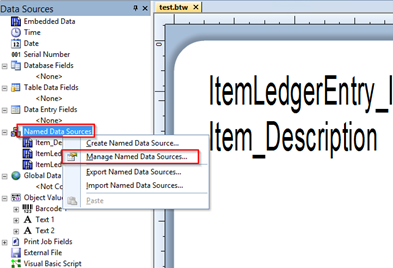
Select Named Data Sources, right click, and select Manage Named Data Sources.
Click the New icon at the bottom left of the window to begin creating a new Data Source.
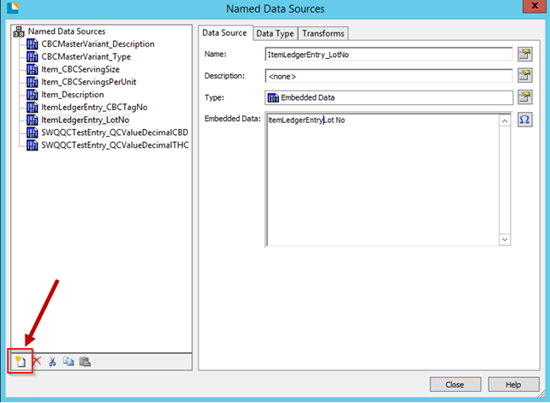
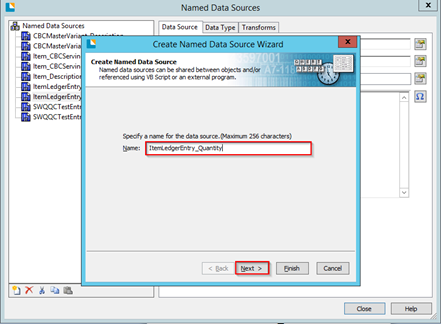
Populate the Name field from the exported Named Data Source Notepad file in the How To: Export the BarTender Label Fields for Integration section. Click Next.
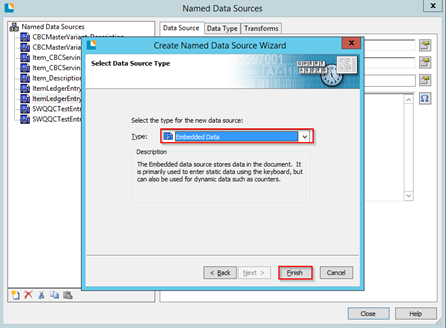
Select the Type Embedded Data and click Finish.
In the Embedded Data enter the same value as the Name.
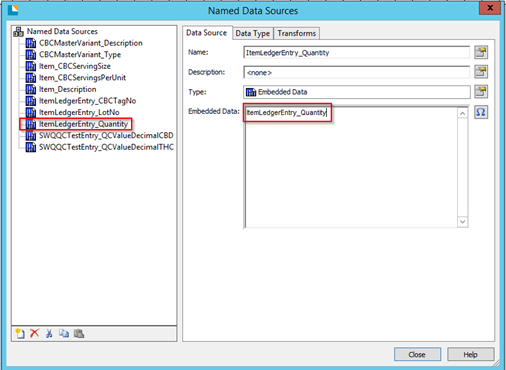
Repeat Steps 3-6 until all fields are added. Click Close when done.
Drag and Drop Named Data Sources onto Labels
Now that you have added the Named Data Sources from Business Central to the BarTender Integration Tool, they can be added to a label using Drag and Drop.
Start a new blank label template or open an existing one.
Simply click, hold, and drag a Named Data Source to the desired location on the label template, then release.
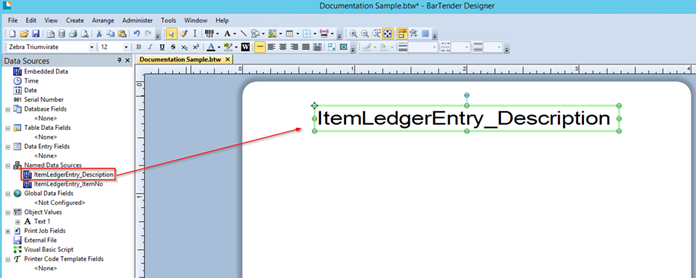
Add a Named Data Source to an Existing Field
You may already have an existing Label Template set up in BarTender you wish to populate with the data from a BarTender Label set up in Business Central that has been added as a Data Source. In this case, you can link the data via the Label Template from within BarTender.
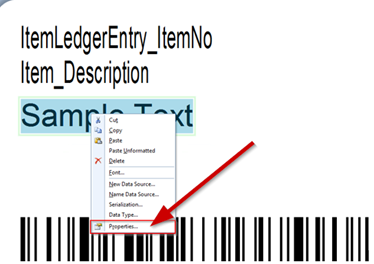
On an existing field in the Label Template, right click and select Properties. This can be done using a simple text field or even a barcode field.
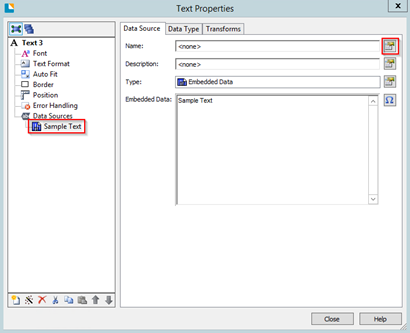
In the Navigation Pane of the new window, select the text in Data Sources, and click the icon next to the Name field.
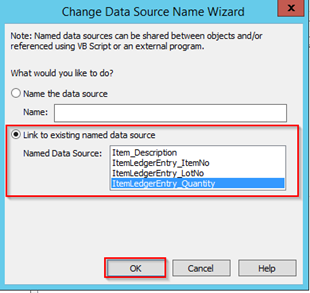
In the new dialogue box, available options created via the steps in the Create Named Data Sources in a Label template process are displayed. Select Link to existing named data source and one of the existing Named Data Sources. Click OK once complete.
How to: Print Pictures from Business Central
The Bartender integration allows the printing of images from the Item Card, Customer Card, and Company Information
Open a Bartender Label Card.
After selecting the table on BarTender Label Tables go into the Fields line action and select the field for the picture.
The picture linked to the selected table will be sent to Bartender as text in the Base 64 format.
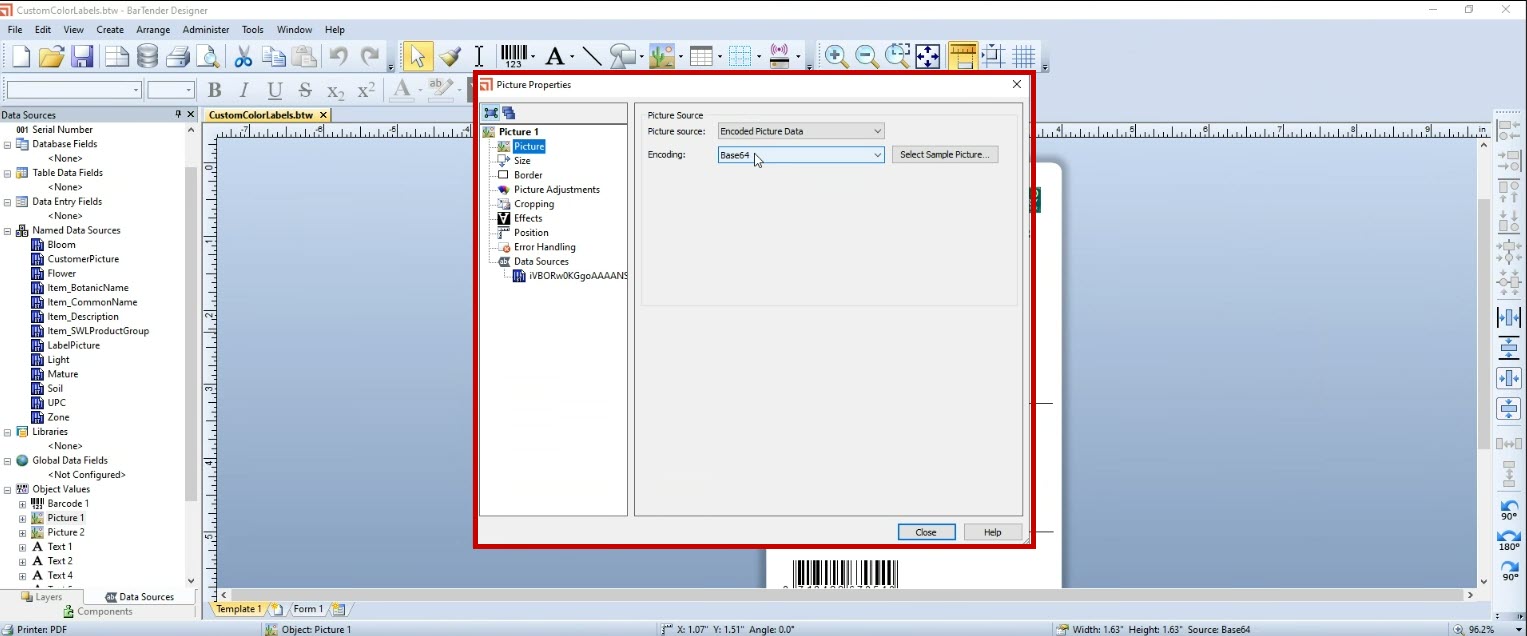
In Bartender Designer set the Picture Object in the template to be encoded in Base64.
